
How to enable Spell Check in Word
All Microsoft Word versions have spell check features that allow you to check spelling as well as correct grammar mistakes that you made in your Word document.
In Microsoft Word, misspelled words appear with the wavy red underline, as shown below.
Mago, allw, wter, wodr, chek, scren, and many more.
There are the following steps to enable Spell Check in Word –
Step 1: Open the Word document.
Step 2: Go to the File tab at the top left corner of the screen. A list of File options will appear on the screen. Click on the Options button.

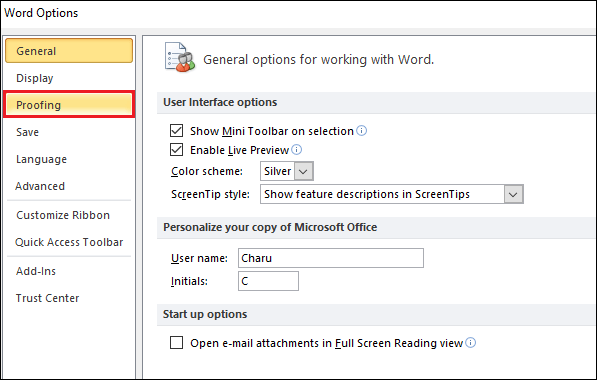
Step 3: A Word options dialog box will appear on the screen in which click on the Proofing at the left pane.
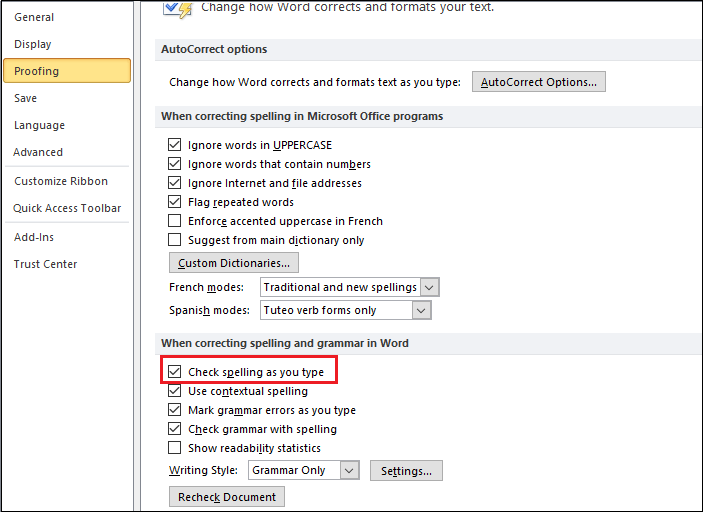
Step 4: Now, tick on the Check spellings as you type checkbox, and click on the OK button, as shown in the below screenshot.
Check spelling manually
Microsoft also allows you to check spelling manually. To do this, go to the Review tab on the ribbon and click on the Spelling & Grammar option in the Proofing group.

Case 1: If there is any spelling mistake in your Word document, then the following dialog box appears with misspelled words present in the red text.

To correct the spelling, go to the Suggestions tab, select the correct spelling, and click on the Change button.
Note: If you do not want to change the spelling, then click on the Ignore Once button.
Case 2: If all spellings are correct in your Word document, then the following pop up window will appear on the screen in which click on the OK button.


