
How to create a drop-down menu in Word document
Drop-down menu is also called as a drop-down list, pull-down menu, pull-down list, or drop-down box. It is used to show a list of options that allows you to select one option from the list based on your requirement.
There are the following two methods to create a drop-down menu in Word document –
Method 1: Using Form Field Option
Follow the below easiest steps to create a drop-down menu in Word document using Form Field option –
Step 1: Open the new Word document or existing Word document where you want to create a drop-down menu.
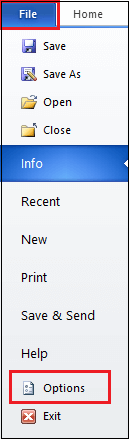
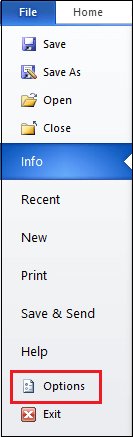
Step 2: Go to the File tab at the top left corner of the document. A list of file options will appear on the screen. Click on the Options tab.
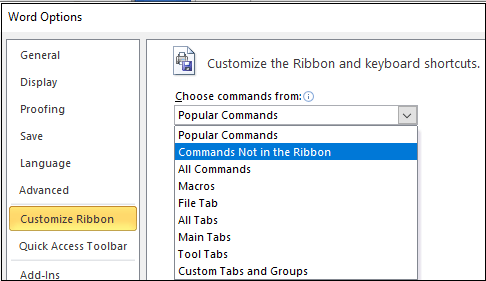
Step 3: A Word options dialog box will appear, click on the Customize Ribbon form the left pane, and select Command Not in the Ribbon form the Choose commands from the drop-down menu.
Step 4: Now, in Word Options dialog box follow the below instructions –
- Click on the Insert Frame.
- Click on the New Group from the right side pane.
- Click on the Add button to insert Insert Form Field into the main tab.
- A new option, Insert From field is added on the right side of the pane.

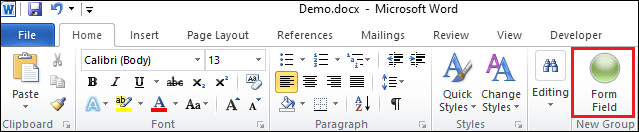
Step 5: A Form Field is added in the top right corner of the document. Click on the Form Field icon.
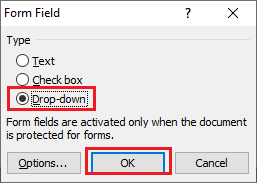
Step 6: A small Form Field window pop up. Click on the radio button associated with the Drop-down and click on the OK button.
Step 7: A small box square box appears, double click on it.
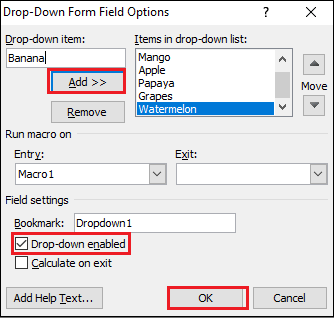
Step 8: Once you click on the box, Drop-Down Form Field Options dialog box will appear on the screen, in which do the following –
1. Enter the item in the Drop-down item text box and click on the Add button to insert an item in the Items in the drop-down list.
Note: Using the above steps, you can add more than one item in the drop-down list.
2. Tick on the Drop-Down enabled checkbox.
3. Click on the OK button, as shown in the screenshot below.
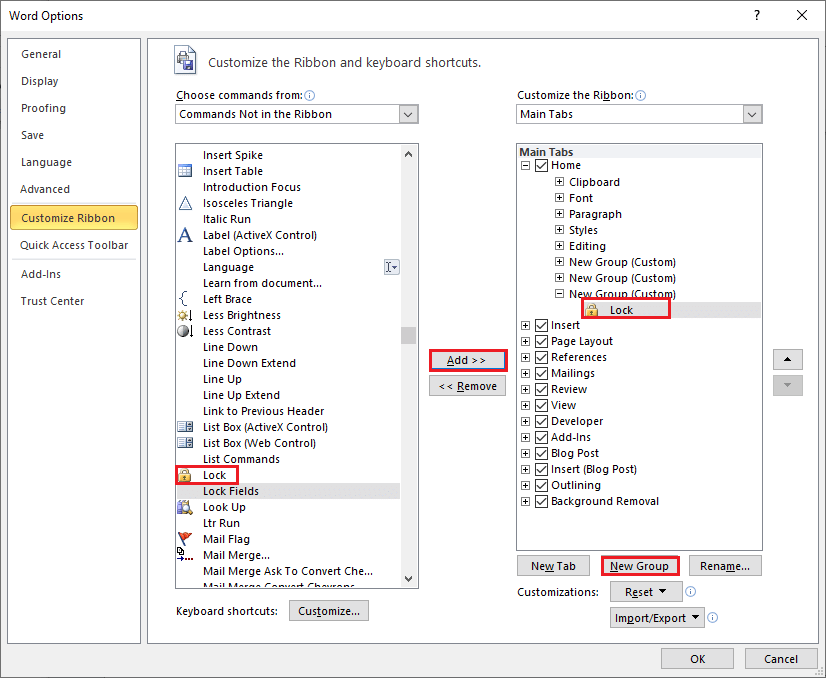
Step 9: Once you create the drop-down list, now you need to lock your drop-down list. To enable Lock, go to File ->Options->Customized Ribbon and select Commands Not in the Ribbon form the Choose commands from the drop-down menu.
Step 10: Click on the Lock -> New Group -> Add, a Lock icon will appear in the Main Tabs, as shown in the screenshot below.
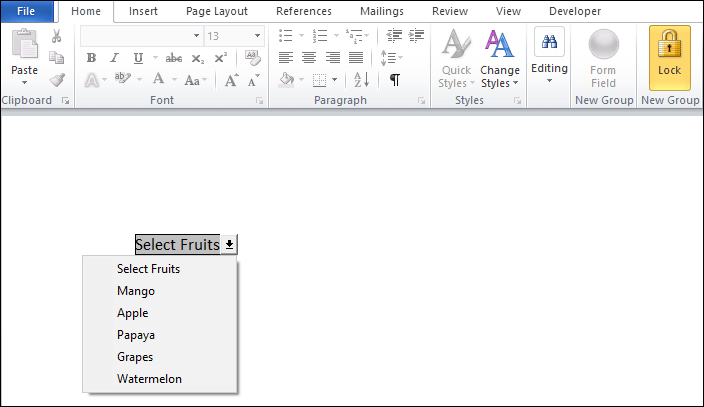
Step 11: Now, you can see that the Lock icon will appear at the top right corner of the screen, click on the Lock icon.

Once you click on the Lock, a drop-down icon will appear on the screen. Click on the drop-down arrow. You can see that your inserted items will appear in the drop-down list.
Method 2: Enabling the Developers tab
To create a drop-down list in Word using the Developers tab, follow the below-mentioned steps –
Step 1: Open a new Word document or an existing Word document.
Step 2: Go to the File tab on the Ribbon. A list of File options will appear on the screen, click on the Options.
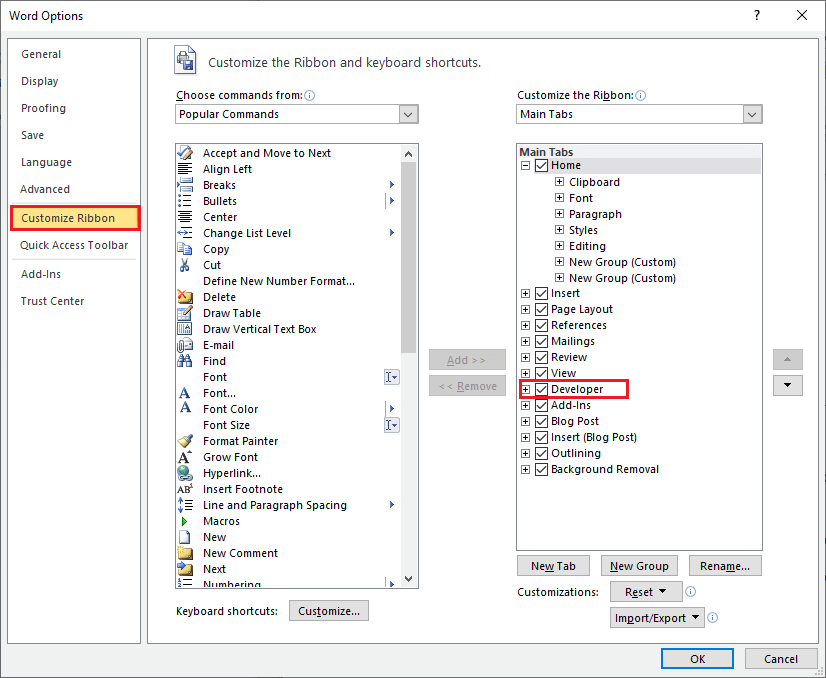
Step 3: A Word Options dialog box will appear on the screen. Click on the Customize Ribbon and tick on the Developers checkbox in the Main tabs.
Note: In Microsoft Word 2019 and Office 365, the Developers tab will appear on the Ribbon.
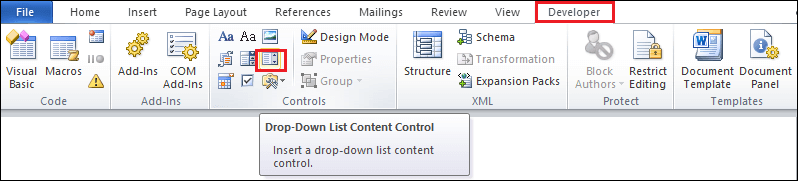
Step 4: Now, the Developer tab will appear on the Ribbon. Click on the Developer tab and select Drop-Down List Content Control in the Controls section.
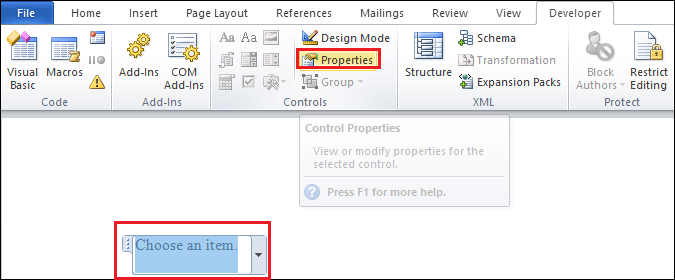
Step 5: A Choose an item box will appear in the current document. To add items in the drop-down list, click on Properties in the Controls section.
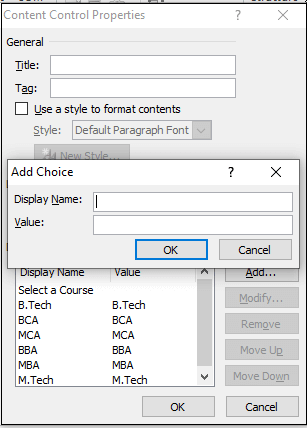
Step 6: A Content Control Properties dialog box will appear on the screen in which do the following.
- Enter the name of the drop-down list in the Title box.
- Click on the Add button to add items on the list. An Add Choice window appears in which enter the Display Name and Value.
- Click on the OK button at the bottom of the screen.
The screenshot below shows that a drop-down list is created in the Word document.


