
Insert Column Excel Shortcut
Excel allows us to work with vast amounts of data. We often need to insert a new column to add more and more data to our worksheet. Additionally, inserting a new column in the existing Excel sheet also helps us add new or missing data between the existing columns.
There are many shortcuts in Excel, including the Insert Column shortcut, which helps make our work fast and convenient. Although we can easily insert a column(s) in Excel by using the ribbon options or by right-click menu, it is always better and faster with the shortcuts. Therefore, we must learn the Insert Column Excel Shortcuts to speed up the overall work process and increase the overall productivity of Excel.
This article discusses some common shortcuts that help us know how to insert a column in Excel quickly. We use Excel 2013 for example purposes during this article; however, the shortcuts also work in other Excel versions accordingly.
‘Insert Column’ Shortcuts in Excel
Some of the essential shortcuts for inserting a column in Excel are listed below:
- By using the shortcut keys ‘Ctrl + Space’.
- By using the shortcut keys ‘Ctrl +’ and ‘Dialog Box’.
- By using the shortcut keys ‘Alt + I + C’.
- By using the shortcut in Quick Access Toolbar
Let us understand each shortcut in detail, including the example:
Inserting a Column using the shortcut ‘Ctrl + Space’.
This is one of the most common methods of inserting a column in Excel with the help of shortcut keys. According to this method, we first have to select the entire column we want to shift or before which we want to insert a column by using the shortcut ‘Ctrl + Space’, and then press the combination of the Ctrl and the Plus key.
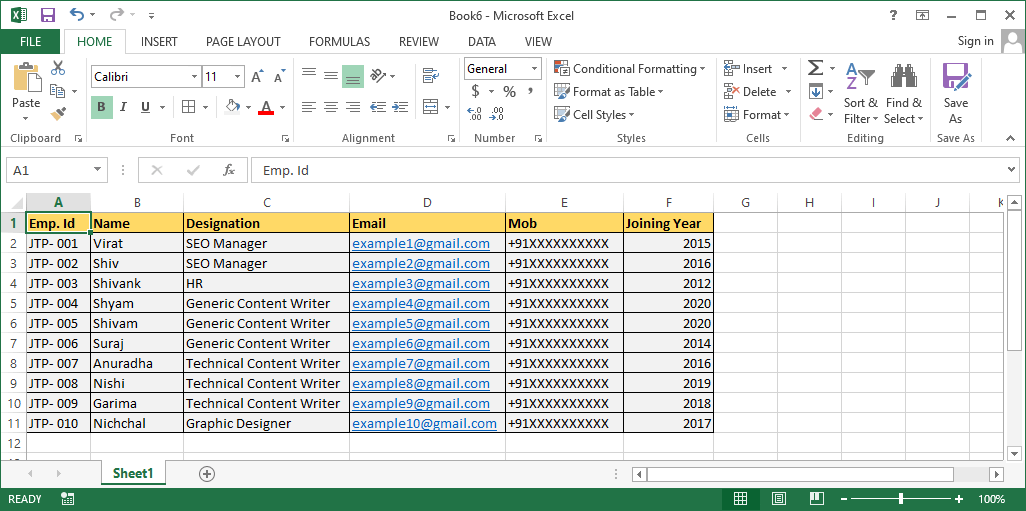
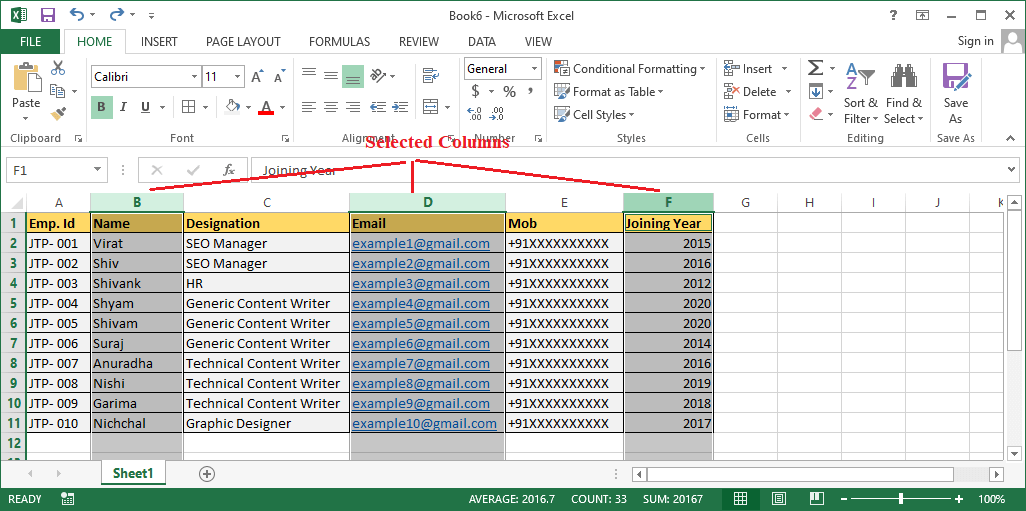
Let us understand this with an example. Suppose we have the following sheet, and we want to insert a new column at column B by shifting the existing columns to the right side.
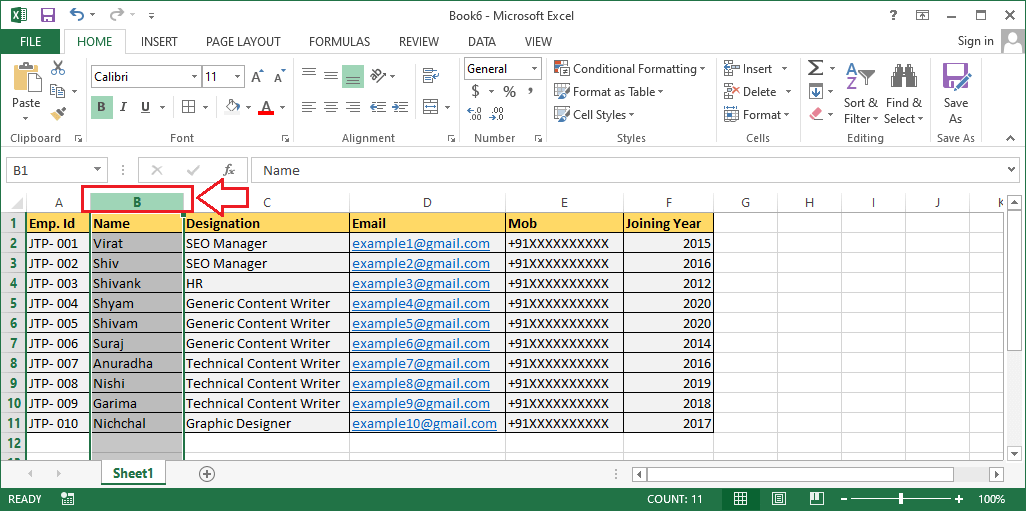
- First, we need to select any specific cell in column B and then press the Ctrl key followed by the Space button, i.e., Ctrl + Space. This will select the entire column B. Alternately. We can also select the entire column B by clicking on the column header.
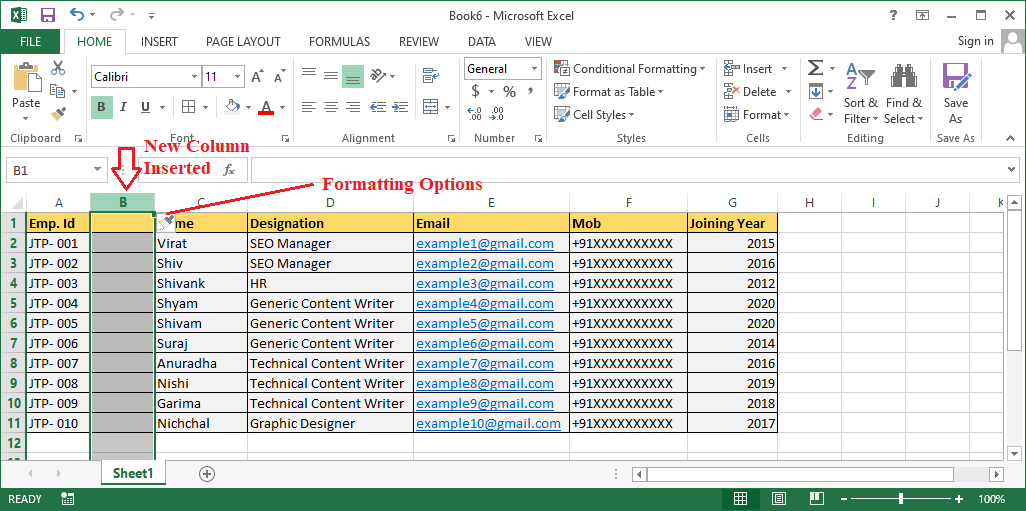
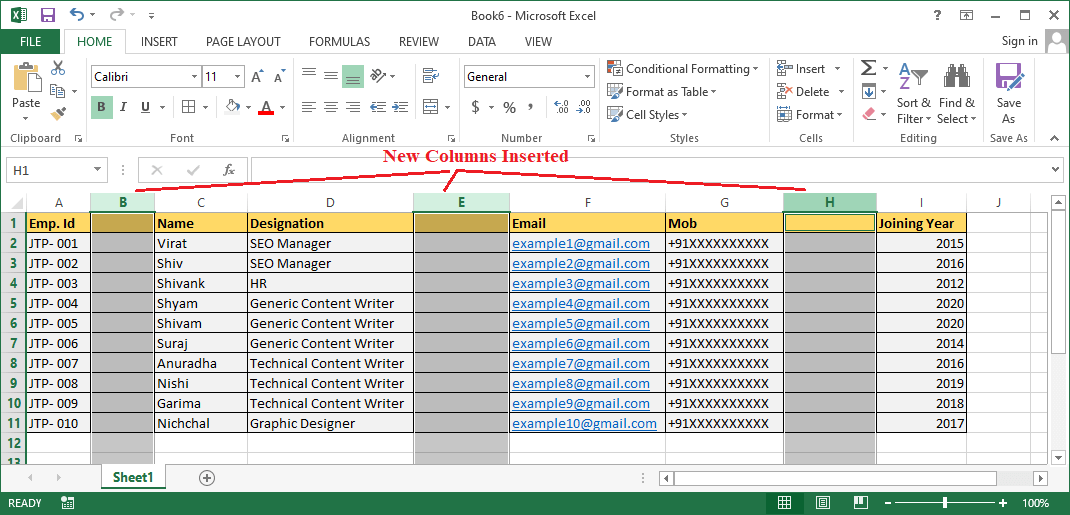
- After selecting the entire column, we need to press the Ctrl key and the Plus key simultaneously, Ctrl + [Plus key]. After this, a new column will be immediately inserted at column B. The existing column B with the other columns after column B will be shifted to the one column right if present.
Similarly, if we want, we can also insert a new column in place of other existing columns.
Inserting a Column using the shortcut ‘Ctrl +’ and a ‘Dialog Box’.
This is another useful method that helps us insert a new column in Excel using the shortcut. However, it is different from the previous shortcut because we get some options after using shortcut keys, and then we must choose a desired option from the Insert dialog window. Since we want to insert a new column, we must select the option ‘Entire Column’ from the list. After that, a new column will be inserted left to the selection.
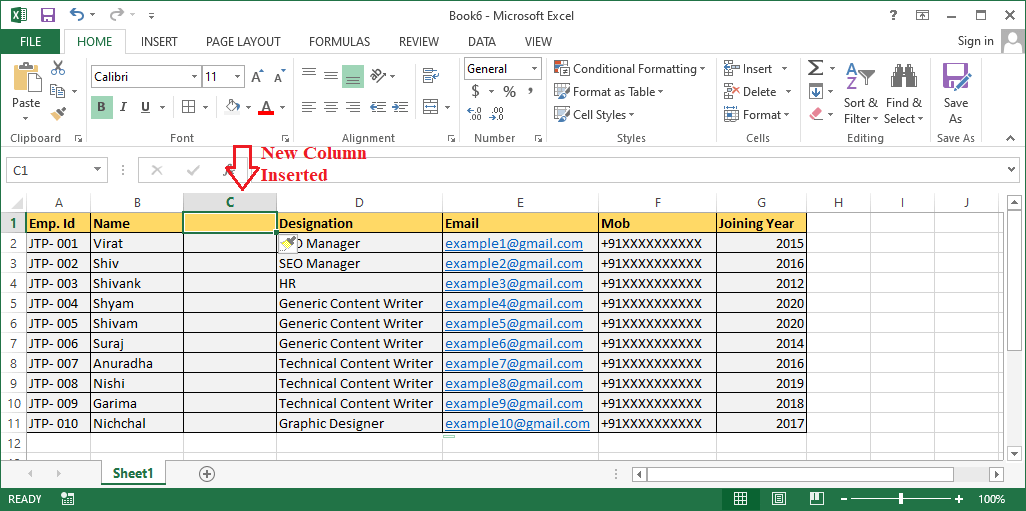
For example, if we have the following Excel sheet and we want to insert a new column at column C by shifting each existing column after column B to the right side.
We can perform this job using the following steps:
- First, we must place a cursor on any specific cell in column C. After that, we need to use the shortcut to launch the ‘Insert dialog box’ by pressing a Ctrl key followed by the Plus key (Ctrl + Plus key) on the keyboard.

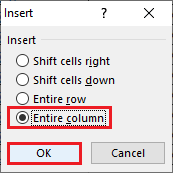
- On the next screen, we will see some options listed in the Insert dialog window. Here, we can insert a new row, column, or shift cells to the right or downside accordingly.
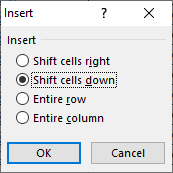
- After that, we must click on the radio button associated with the option ‘Entire Column’ and click the ‘OK’ button.
- As soon as we select the desired option from the dialog box, a new column will be inserted immediately at the current selection.
While choosing a desired option from the dialog box, we can either use mouse buttons or the keyboard keys (‘C + ENTER’, for inserting a column). It must be noted that keyboard keys can be used only in Excel 2016 and higher versions.
Inserting a Column using the shortcut ‘Alt + I + C’.
Another shortcut to insert a new column in Excel involves using an Alt key, which typically enables the advanced shortcuts in Excel. That means, if we press the Alt key on the keyboard while working in Excel, there will be specific keyboard buttons in the ribbon associated with the corresponding options/ commands listed there. We are only required to press the associated key to perform the respective function immediately.
We can also press specified keys in a sequence to perform functions from the sub-menu of the ribbon options. This way, we can use the shortcut ‘Alt + I + C’ and insert a new, blank row left to the selection.
For example, suppose we have the following excel sheet, and we need to insert a new column at column C. In other words, we need to insert a new column after column B by shifting the existing column C one column to the right side.
- First, we need to select any specific cell in the column where we want to insert a new one. In our case, it is column C. So, we select a cell C3 that is in column C.

- After that, we must press the shortcut ‘Alt + I + C’. As soon as we press the shortcut, the new column will be inserted at column C.

In the above image, we can see that the existing (previous) C column is shifted to column D by shifting other columns to the right. Likewise, we can also insert a new column in between other columns.
Inserting a Column using the shortcut in Quick Access Toolbar
Quick Access Toolbar is an excellent feature of MS Excel. This feature mainly allows users to customize the toolbar accordingly and add/ modify the shortcuts in it. The quick access toolbar is located on the top of the Excel window or above the ribbon.
If we need to insert a column in MS Excel very often, we can easily add a shortcut in the quick access toolbar. We only need to add a shortcut once, and it will be available whenever we open MS Excel. This shortcut is helpful for people who prefer using a mouse over the keyboard.
We need to follow the steps discussed below to configure an insert shortcut in the quick access toolbar and further use it when desired:
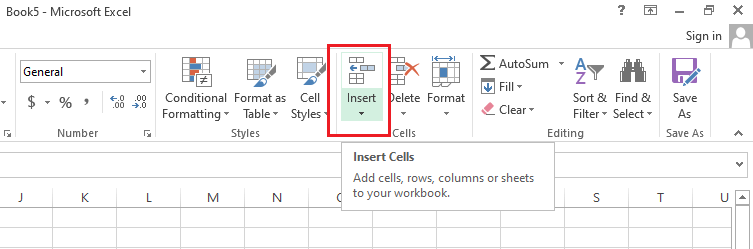
- First, we need to navigate to Home > Insert.
- Then, we need to click on the drop-down icon next to the ‘Insert’ button.
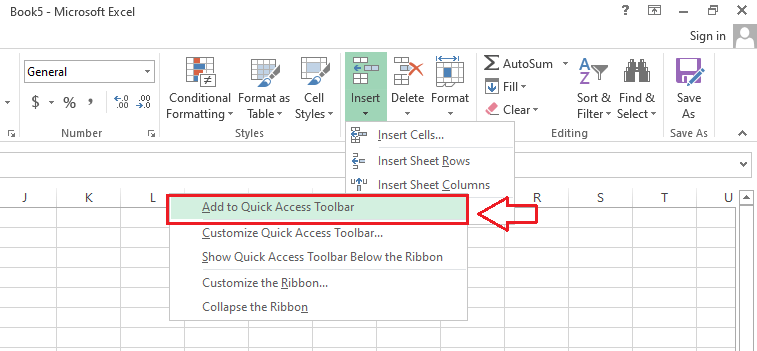
- After that, we must place the cursor at ‘Insert Sheet Column’ and right-click on it to open the sub-menu list.
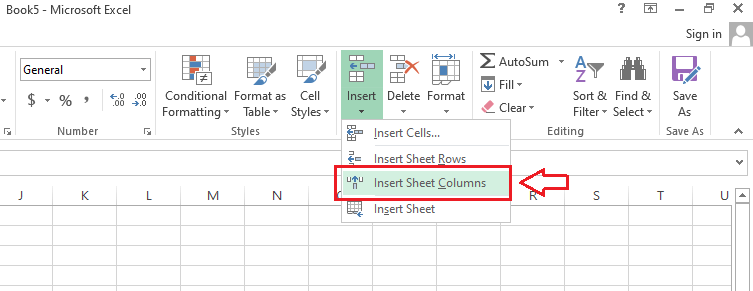
- Lastly, we need to click on the option ‘Add to Quick Access Toolbar’, and the corresponding shortcut to insert a column will be immediately added to the toolbar.
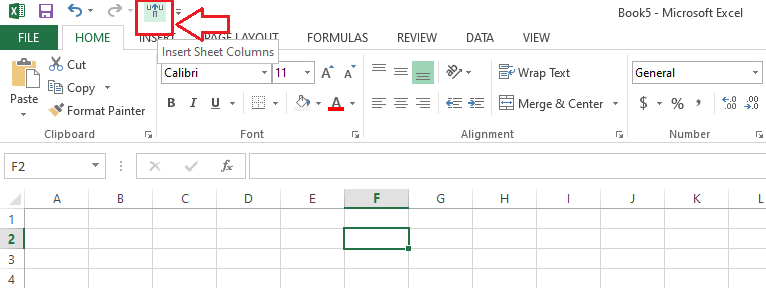
- Once the shortcut is added to the toolbar, we can insert a column by clicking on this shortcut. It looks like this:
How to insert multiple columns by using Excel shortcuts?
Although we can insert multiple columns by using any of the above shortcuts several times for each column, there is a quick, alternate way to add multiple columns at once. The alternative method usually involves using the above-defined shortcuts, but only after selecting the required numbers of columns.
According to this method, we need to follow the steps discussed below to insert the desired number of columns in Excel using the Excel shortcuts:
For Inserting Multiple Adjacent Columns
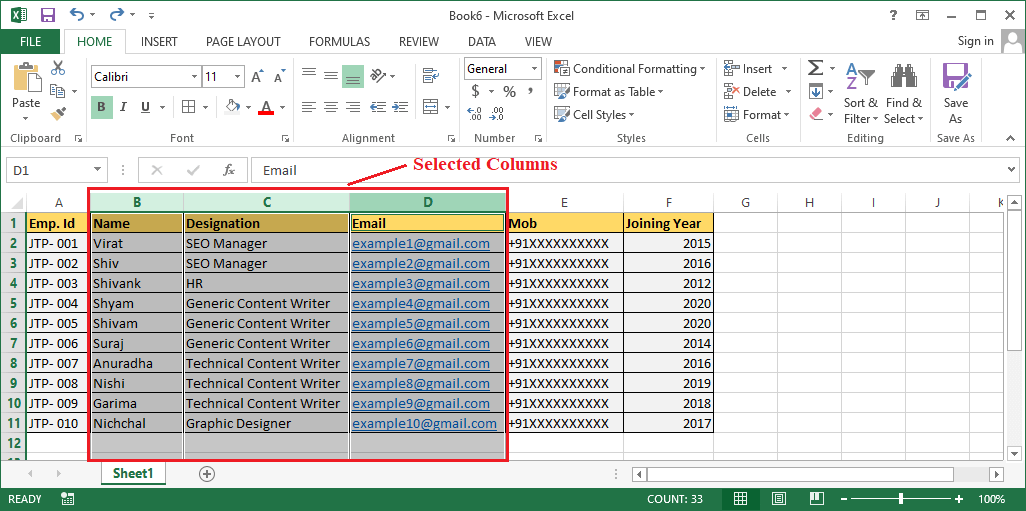
- First, we need to select or highlight the existing column equal to the desired number of new columns. For example, suppose we want to insert three new columns in columns B, C, and D. Then, we must select existing columns B, C, and D.
To select multiple adjacent columns, we need to press and hold the shift key and click on each column’s column headers or column letters.
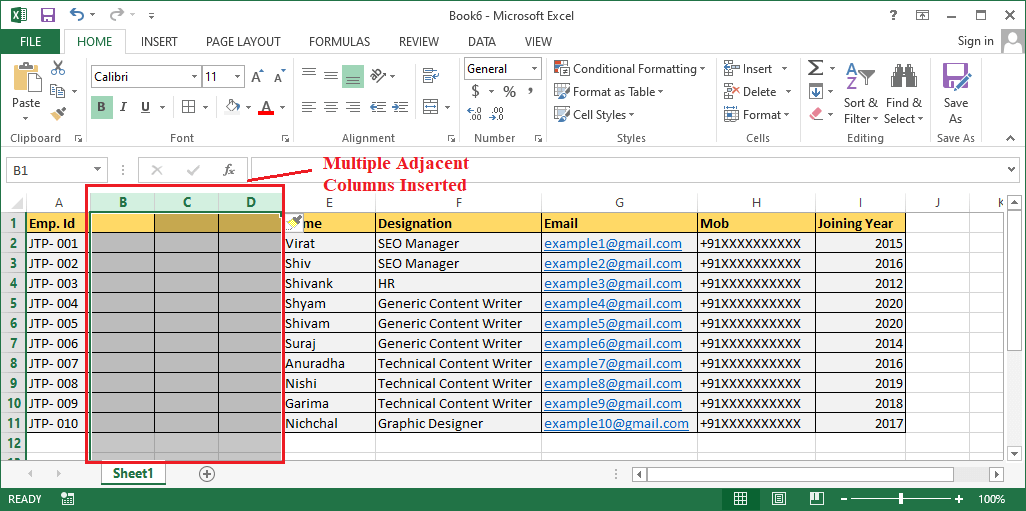
- After the desired numbers of columns are selected, we must use the shortcut ‘Ctrl + Plus key’. Alternately, we may need to press ‘Ctrl + Shift + Plus Key’ on the keyboard to insert multiple columns based on the selection. This will immediately insert multiple new columns in the worksheet. The new columns are adjacent and will be inserted to the left side of the selection.
For Inserting Multiple Non-Adjacent Columns
- Like adjacent columns, we must select/ highlight the corresponding number of non-adjacent columns that we want to insert. To select multiple non-adjacent columns, we need to press and hold the Ctrl key and click on the column headers or column letters.
- After selecting the specific number of non-adjacent columns, we need to use the shortcut ‘Ctrl + Plus Key’. By doing this, newly inserted non-adjacent columns will appear to the left side of the selection.
In this way, we can insert multiple columns in Excel by using the shortcut once instead of using it repeatedly. However, we must select the same number of columns that we need to insert in our worksheet before using any shortcuts. Furthermore, we can immediately press the ‘F4’ function key to insert the same number of columns again that we added just now.


