
Using Themes in Excel
MS Excel or Microsoft Excel is one of the most powerful spreadsheet software or tools to organize data in rows and columns. It allows us to organize the data and offers various formatting features to enhance the visual presentation of the spreadsheets. When it comes to formatting the appearance of the workbooks/ spreadsheets, Themes are one of the core features of Excel.

This article discusses the brief introduction of Excel themes and the step-by-step methods of using themes in our spreadsheets. Additionally, this article also explains the process of using custom themes and saving them for future use.
What are the Themes in Excel?
Themes in Excel are inbuilt and customizable functions that help change the look or formatting of the entire workbook. Themes are created with a collection of colors, fonts, and shape effects.
Excel has multiple themes present by default that we can use with a few clicks. Each Excel theme usually consists of 12 colors, two fonts (one for heading, one for body), and various effects for shapes and SmartArt. Using the colors, we can format text and other objects within the workbook, while the theme effects help us manage coordinated formatting preferences for shapes and other objects.
Excel Theme helps us seamlessly coordinate between colors, fonts, and graphics formatting, making them easy to use and update. Through the Excel Theme section on the Ribbon, we can select any standard or desired color theme, create our custom color theme, change theme fonts, switch from an existing theme to a particular theme, save a custom theme for reuse or make various changes to the default theme as per our likings.
How to apply a Workbook Theme?
While using themes in Excel, we can either apply existing themes or create our customized themes using the given Excel tools. Thus, we can apply the workbook theme using two different methods depending on our choice, namely:
- Applying the Default Themes in Excel
- Applying the Custom Themes in Excel
Let us now discuss each method in detail:
Applying the Default Themes
The word ‘default’ represents existing or core features and the default themes are the built-in themes present in Excel. We can easily change the overall look of the workbook in a few clicks by using the default Excel theme. However, they usually change color, font, and shape effects based on some common criteria saved by Excel.
We can perform the following steps to use default (built-in) themes in Excel:
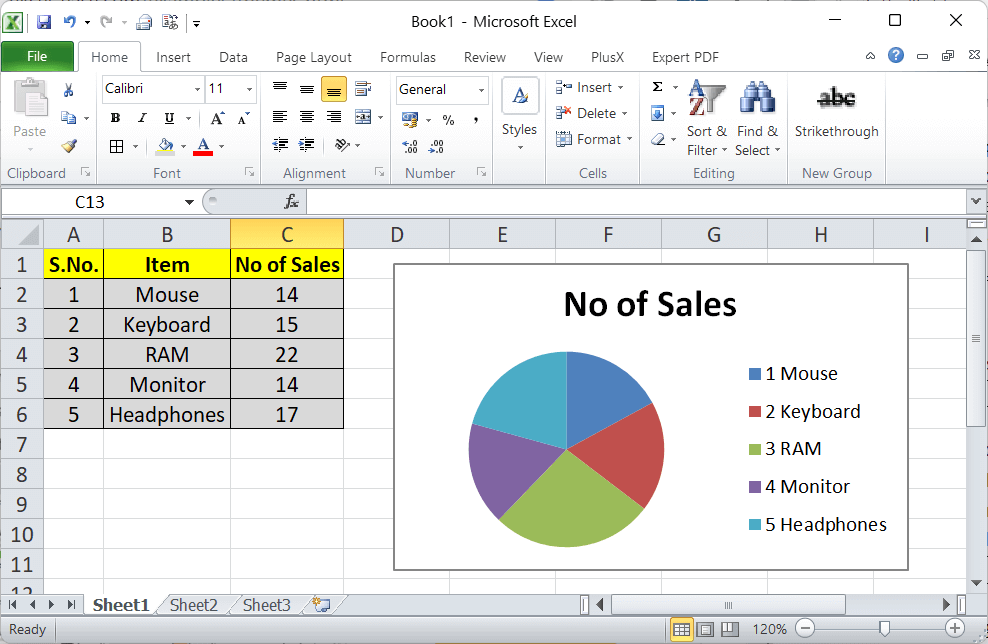
- Suppose we have the following Excel sheet with some sales data and respective charts. The sheet has a basic theme of Excel.
We need to change the basic theme in the example sheet with other existing Excel themes. - To change a basic theme into another default or built-in theme, we need to go to the Page Layout tab on the Ribbon. Next, we must click the drop-down icon associated with the text ‘Themes’. It looks like this:

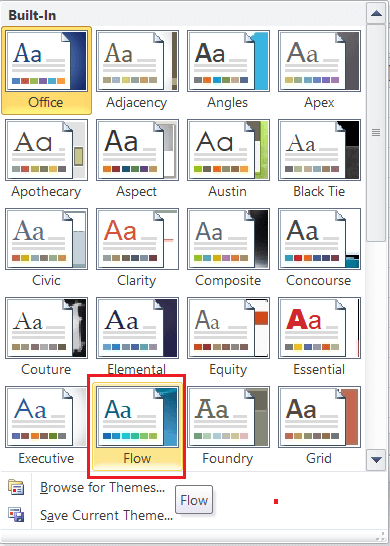
- After clicking the Themes tool, Excel displays various themes present in Excel. We can hover on the cursor on any of the existing themes to see the preview of it. Once we finalize the theme to be used, we must click on it to apply it to our workbook. In our example, we click and apply the ‘Flow’ theme into our workbook.
After applying the desired theme to our example worksheet, it looks like the following image:

The above image shows that the chart colors and font styles have been changed within the worksheet after applying the theme. Likewise, we can choose and apply other built-in themes.
That is how we can easily use desired themes in Excel.
Applying the Custom Themes
Although there are many default themes in Excel, we may sometimes need specific themes for our document. Since the default theme is a collection of random colors, fonts, and shape effects, Excel also allows us to change these preferences as per our liking. However, it may take longer to change each preference one by one. By using custom themes, we can ensure a consistent, matching, and professional look for our workbooks, suitable for the color or styling of our company’s branding or other guidelines.
We can customize colors, fonts, and shape effects of existing themes to create our custom theme in Excel:
Customizing a Workbook Theme
Customizing a workbook theme refers to the process of changing the color, font, and shape effects of an existing theme to our liking. We can easily do this by using tools under the Page Layout tab in the Themes group.
- Changing the Colors: There are many color schemes available in Excel, and they can be selected by going to Page Layout > Colors. We can select the desired color scheme from the list, and the colors will be changed within the workbook as per the selection.
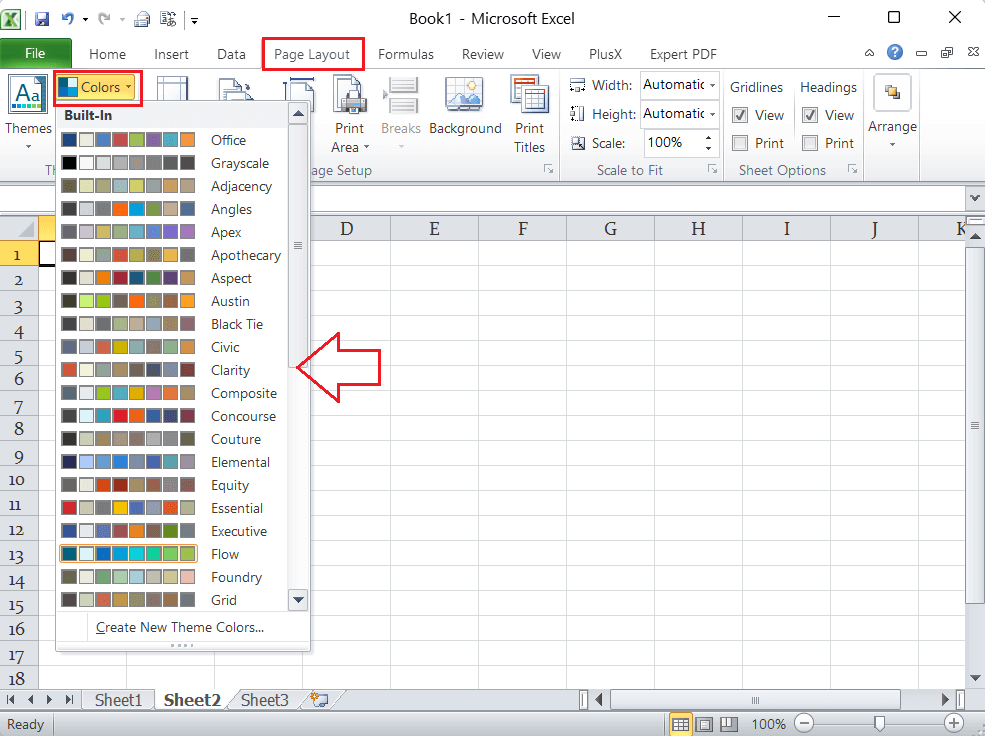
In addition, we can also choose customized colors and create our custom color scheme. We can save our custom color scheme and use it whenever we want. For this, we have to go to Page Layout > Colors > Customize Colors. In Excel 2010 and lower versions, we must go to Page Layout > Colors > Create New Theme Colors.

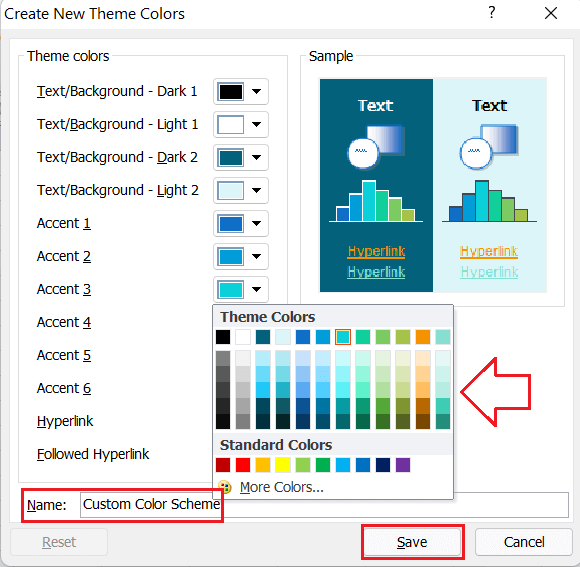
In the next window, we can choose the desired color for the text background, accent, hyperlink, etc. Once all the changes are done, we need to type in a desired name for the customized color scheme and click the Save button.
The customized color schemes can be used by going to Page Layout > Colors > Custom.

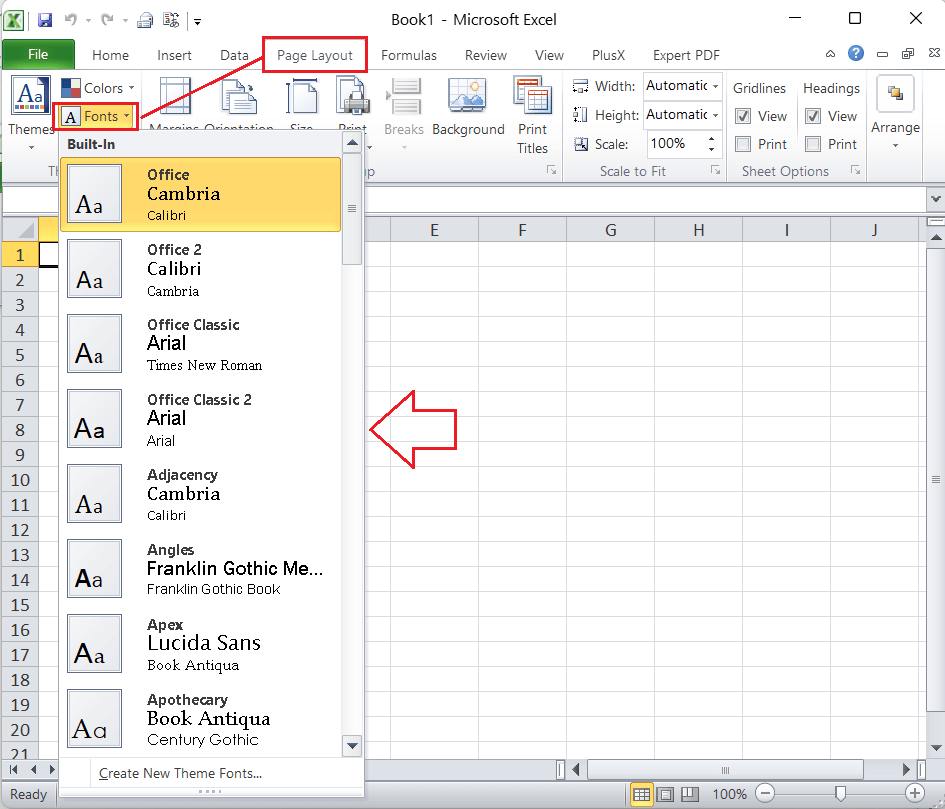
- Changing the Fonts: Like the theme colors, Excel allows us to change font styles within the workbook theme. By default, the font named ‘Calibri’ is the font used in Excel workbooks. However, we can select the desired font from the list of built-in fonts, and the corresponding font will be applied within the workbook.
For this, we need to go to the Page Layout tab, click the drop-down icon associated with the text ‘Fonts’, and select the desired font from the list. It looks like this:
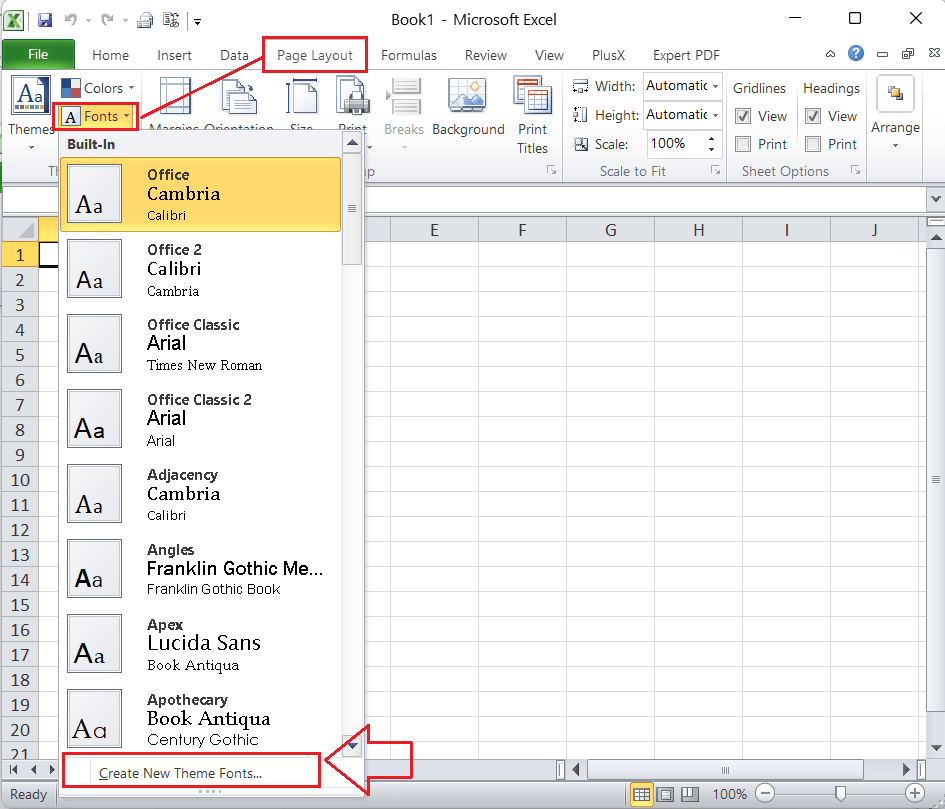
In addition, we can also customize fonts and create our custom font scheme. We can save our custom font scheme and use it whenever we want. For this, we have to go to Page Layout > Fonts > Customize Fonts. In Excel 2010 and lower versions, we must go to Page Layout > Fonts > Create New Theme Fonts.
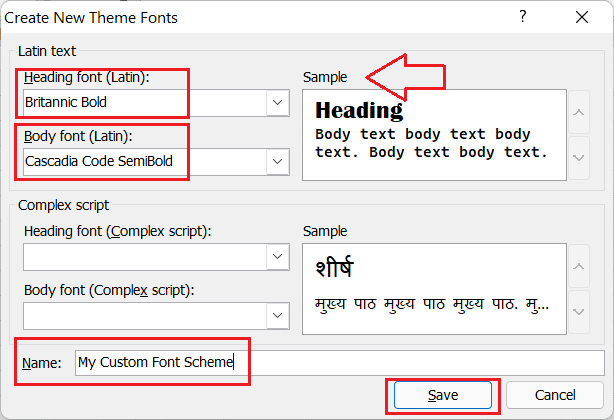
In the next window, we can choose the desired font for the heading and body. The window also displays the preview of the selected fonts under the Sample box. Once all the changes are done, we need to type in a desired name for the customized font scheme and click on the Save button to save it as a customized font theme.
The customized font schemes can be used by going to Page Layout > Fonts > Custom.

- Changing the Effects: Changing the theme effects helps apply different stylings to the shapes and fonts present in the Excel sheet. We can easily change the effects by navigating to Page Layout > Effects. After we click the drop-down icon associated with the Effects, Excel displays many existing Office effects.
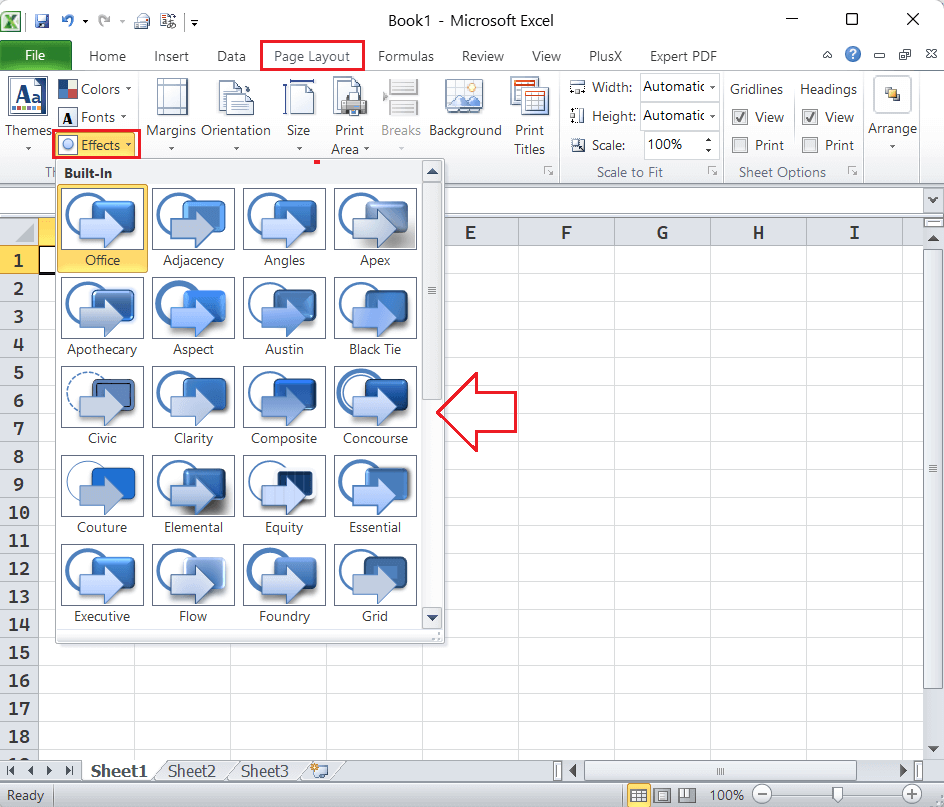
In the above image, we can select any desired shape effects, and the changes will occur within the active workbook. The shape effect feature is mainly used to quickly change the styling or formatting of Smart Shape present or inserted in the data table.
In this way, we can adjust the theme elements and create our custom theme in Excel. Also, if we need to use the same combination again and again in the future, we can even save our custom themes accordingly.
How to save a Custom Theme created in Excel?
After making changes to existing or default themes, it is a good option to save it as a custom theme to use the same preferences in future Excel workbooks. Saving the applied changes as a custom theme will also bundle all the custom colors, fonts, and shape effects we created and applied into the workbook.
To save our applied changes together into one theme, we must navigate to the Page Layout tab, click the ‘Themes’ tool, and select ‘Save Current Theme’.
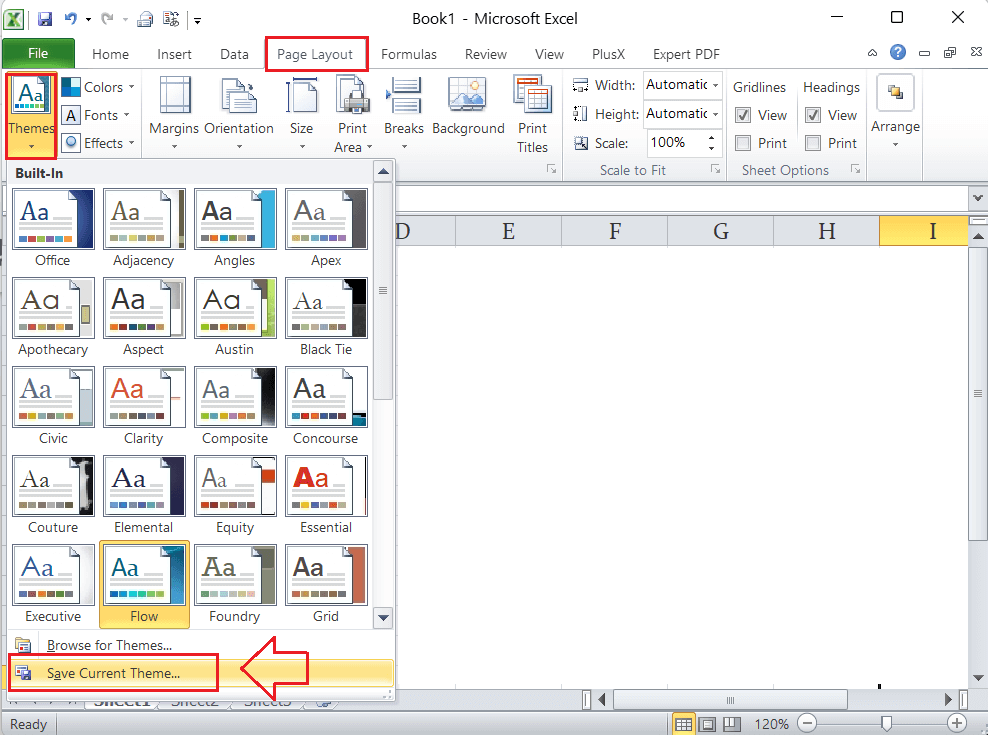
After clicking the ‘Save Current Theme’ option, Excel will open the file explorer to choose a location to save our customized theme. Also, we can type a desired name for the custom theme.
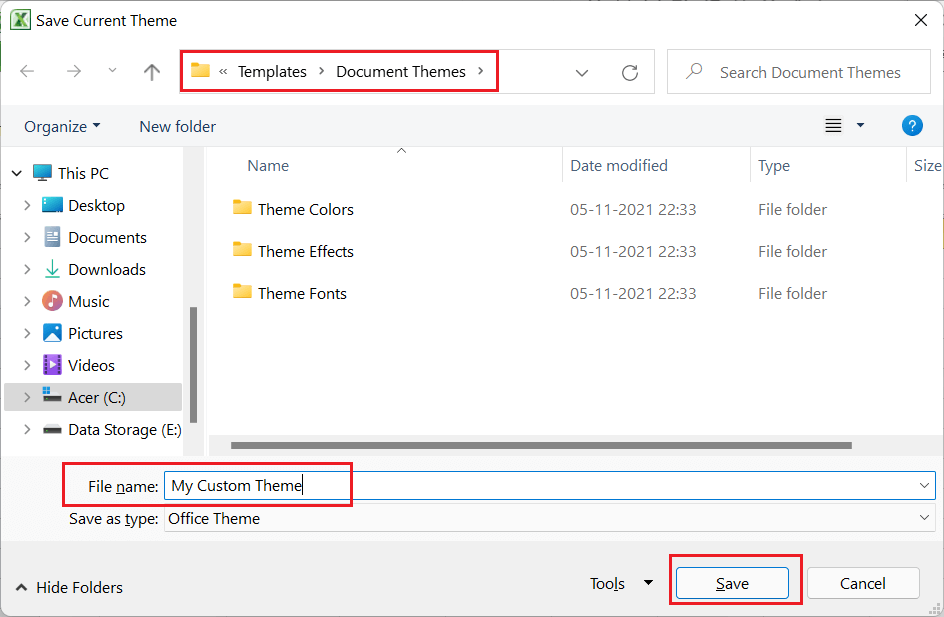
Excel themes are usually saved in the THMX file format. By default, Excel themes are saved in Microsoft’s Templates folder, and excel automatically reads this folder location and synchronizes the available themes directly within Excel. That’s why the default location for saving custom themes is preferred. We can access the saved custom themes from Page Layout > Themes > Custom.

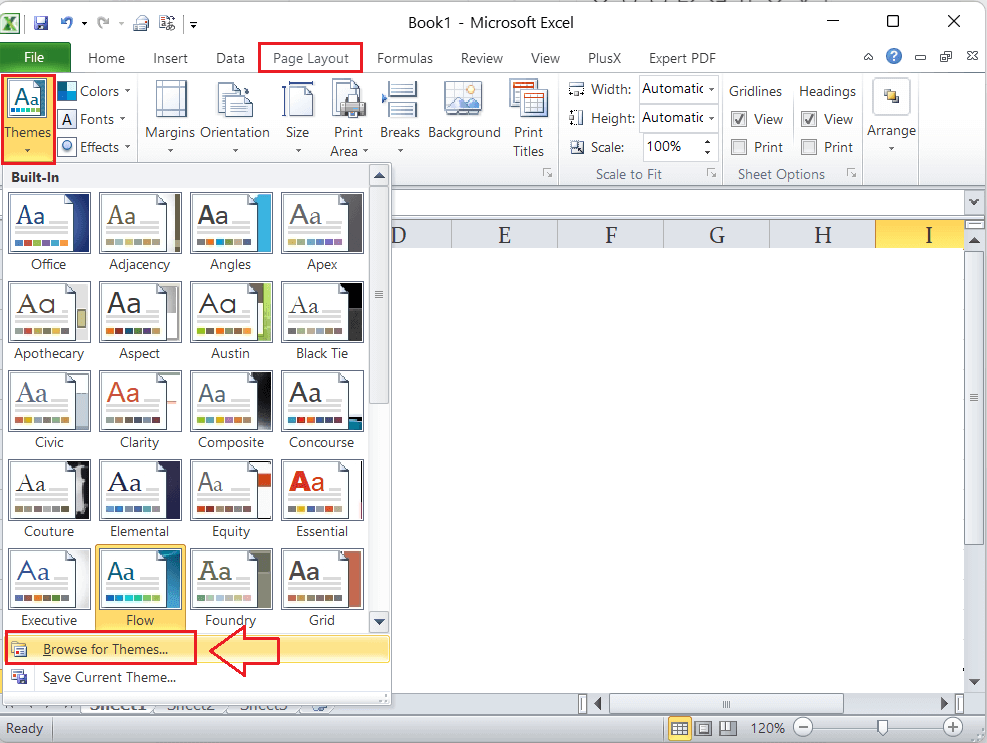
On the other hand, if we save the customized theme in a folder other than the default location, we have to browse the respective theme manually to apply it. We need to go to Page Layout > Themes > Browse for Themes to select or apply a theme saved elsewhere and not in the Templates folder.
After browsing the desired custom theme using the file explorer, we can open it to apply the corresponding colors, fonts, and effects to our workbook. Using this way, we can save hours of formatting time.
Important Points to Remember
- It is good to use light colors and simple fonts when using customized Excel themes for professional documents or projects.
- Excel themes generally work for tables, charts, shapes, slicers, pivot tables, etc.
- If we share an Excel worksheet with a customized theme for another user, the user will not see the custom theme that we have created. However, the theme colors and font styles will be displayed to the other user.
- If we apply an existing theme to our customized theme in an Excel workbook, all previously made changes will be replaced with the style and formatting of the default theme we chose.


