
How to add and remove a page break in Word
A page break is an important feature of the page layout that helps you to add a new page in the document. Typically, a page break is used when we are writing a longer document like a project report, thesis, or research papers. The main purpose of page break is to break longer documents into a series of distinct chapters.
Types of page break
In Microsoft Word, there are three types of page break that you can add to your document ?
1. Simple Page Break
Simple page break is the most commonly used page break in a Word document. It is used to mark the point at which a page ends and a new page begins.
2. Column Break
Column break is used to divide a document into columns without losing your Word formatting. You can use a column break when you have multiple columns in your document.
3. Text Wrapping Break
Text wrapping page break is used when the document contains pictures.
Add page break in Word
In Microsoft Word, a page break is automatically added when your content does not fit on the page.
There are the following easiest methods that you can use to add page break in Word ?
Method 1: Using the keyboard shortcut key
In a Word document, you can add page break using the keyboard shortcut key CTRL + Enter.
Place the cursor on the Word document. Press the CTRL + Enter key to apply a page break to the document.

Method 2: Using Insert Tab
To add page break in your document, simply follow the below steps ?
Step 1: Place the cursor where you want to add a page break to the Word document.
Step 2: Click on the Insert Tab on the Ribbon.
Step 3: Click on the Page Break button in the Pages section.

The below screenshot shows that a page break is added in the Word document.

Method 3: Using Page Layout Tab
Follow the below steps to add page break in Word ?
Step 1: Go to the Page Layout tab on the Ribbon.
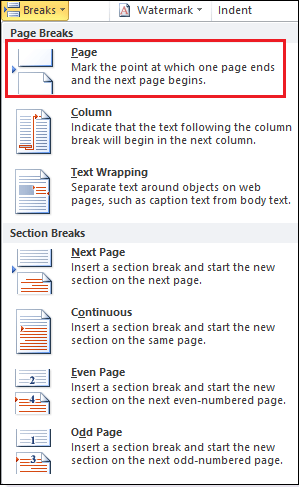
Step 2: Click on the Breaks option in the Page Setup section.

Step 3: A Page Breaks menu appears on the screen. Select page break according to your requirement.
The below screenshot shows that page break is added in a Word document.

Remove page break from Word document
In Microsoft Word, we can’t remove page break manually.
Method 1: Remove page break using Delete Key
Follow the below easiest steps to remove page break using Delete key ?
Step 1: Open your Word document.
Step 2: Go to the Home tab on the Ribbon. Click on the Show and Hide button in the Paragraph section.

Step 3: Once you click on the show/hide button, the following screen appears on the screen.
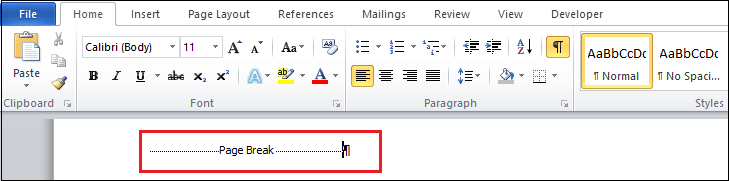
Step 4: Place the cursor at the center of Page Break text and double click on it to select it.
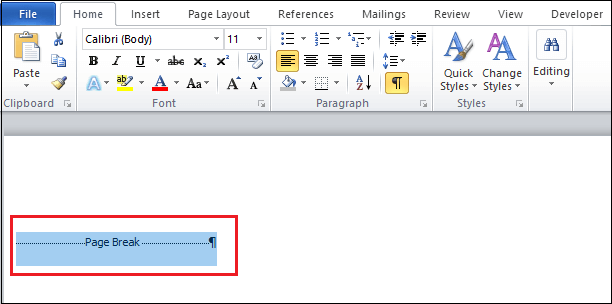
Step 5: Press Delete key from the keyboard.
Method 2: Using Find and Replace Window
Step 1: Open the Word document.
Step 2: Press the Ctrl + H key from the keyboard, a Find and Replace window appears on the screen. Click on the More button at the bottom of the screen.
Step 3: Go to the Replace tab. Click on a Special tab, a list of options appears on the screen in which click on the Manual Page Break, as shown in the below screenshot.

Step 4: In find what text box, ^m symbol appears. Click on the Replace All button.

Step 5: The following pop-up window appears on the screen, click on the OK.

Now, you can see that a page break is removed from the Word document.
Note: Using Find and Replace method, you can remove more than one page break.


