Split Cells
Split a Cell | Text to Columns | Flash Fill | Formulas to Split Cells
To split a cell in Excel, add a new column, change the column widths and merge cells. To split the contents of a cell into multiple cells, use the Text to Columns wizard, flash fill or formulas.
Split a Cell
Use the following trick to “split” a cell in Excel.
1. For example, task B starts at 13:00 and requires 2 hours to complete.

Suppose task B starts at 13:30. We would like to split cell B3 and color the right half.
2. Select column C.

3. Right click, and then click Insert.

Result:

4. The default width of a column is 64 pixels. Change the width of column B and C to 32 pixels.

5. Select cell B1 and cell C1.
6. On the Home tab, in the Alignment group, click the down arrow next to Merge & Center and click Merge Cells.

Result:

7. Repeat steps 5-6 for cell B2 and cell C2 (and cell B4 and cell C4).
8. Change the background color of cell B3 to No Fill.
Result:

Note: suppose task A ends at 15:30. Use the trick explained above to “split” cell E2. Download the Excel file and give it a try.
Text to Columns
To split the contents of a cell into multiple cells, use the Text to Columns wizard. For example, let’s split full names into last and first names.
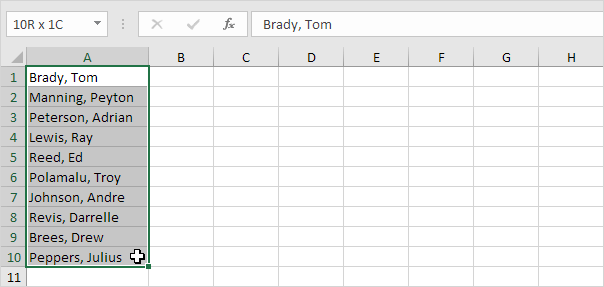
1. Select the range with full names.

2. On the Data tab, in the Data Tools group, click Text to Columns.

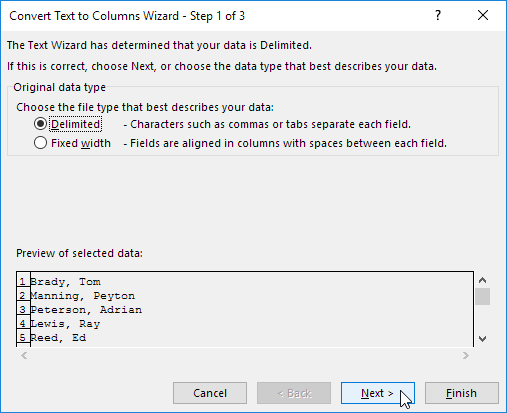
The following dialog box appears.
3. Choose Delimited and click Next.

4. Clear all the check boxes under Delimiters except for the Comma and Space check box.
5. Click Finish.

Result:

Note: this example has commas and spaces as delimiters. You may have other delimiters in your data. Experiment by checking and unchecking the different check boxes. You get a live preview of how your data will be separated.
Flash Fill
Do you like Magic? Instead of using the Text to Columns wizard, use flash fill to quickly split data into multiple columns.
1. First, split the contents of one cell into multiple cells.

2. Select cell B1 and press CTRL + E (flash fill shortcut).

3. Select cell C1 and press CTRL + E.

4. Select cell D1 and press CTRL + E.

Note: flash fill in Excel only works when it recognizes a pattern. Download the Excel file and give it a try. Visit our page about Flash Fill to learn more about this great Excel tool.
Formulas to Split Cells
One drawback when using these tools is that the output will not automatically update when the source data changes. Create formulas to overcome this limitation. Let’s split full names into first and last names.
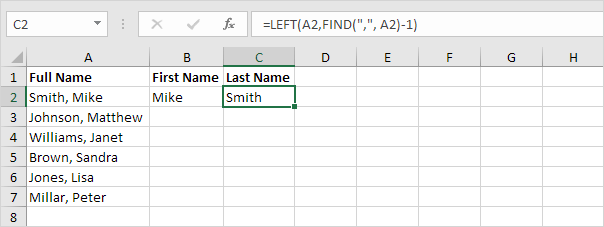
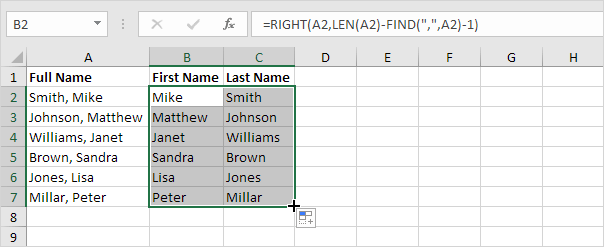
1. The formula below returns the first name.

2. The formula below returns the last name.

3. Select the range B2:C2 and drag it down.

Note: visit our page about separating strings to understand the logic behind these formulas.
Next Chapter: Formulas and Functions


