
Quick Access Toolbar in Excel
The Quick Access Toolbar (QAT) is a small, customizable toolbar at the top of the Office application window that contains a set of frequently used commands. These commands can be accessed from almost any part of the application, independent of the ribbon tab that is currently opened.
The Quick Access Toolbar has a drop-down menu containing a predefined set of the default commands, which may be displayed or hidden. Additionally, it includes an option to add your own commands.
There is no limit to a maximum number of commands on the QAT, although not all the commands may be visible depending on the size of your screen.
Where is the Quick Access Toolbar Located?
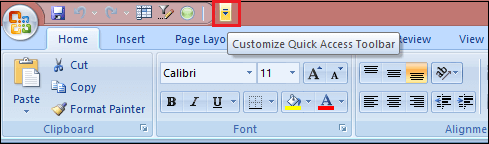
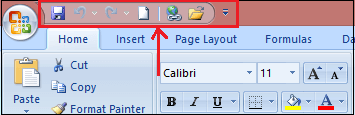
A customizable toolbar is located in the upper left corner of the Excel window, above the ribbon. If you want QAT to be closer to the worksheet area, you can move it below the ribbon.
When you click the down arrow at the end of the quick access toolbar, it displays more commands. You can add any of these commands to the quick access toolbar by a left click on the command.
Customized Quick Access Toolbar
By default, the Excel Quick Access Toolbar contains only three buttons: Save, Undo, and Redo. If you use a few other commands frequently, you can add them to the Quick Access Toolbar.
Microsoft provides many customization options for the QAT, but still, certain things cannot be done.
You can customize or free to personalize the Quick Access Toolbar with the following things, such as:
- Add your own commands.
- Change the order of commands, both default, and custom.
- Display the QAT in one of the two possible locations.
- Add macros to the Quick Access Toolbar.
- Export and import your customizations.
But here is a list of the following things that cannot be changed or cannot be customized, such as:
- You can only add commands to the Quick Access Toolbar. Individual list items (e.g., spacing values) and individual styles cannot be added. However, you can add the whole list or entire style gallery.
- Only command icons can be displayed, not text labels.
- You cannot resize the Quick Access Toolbar buttons. The only way to change the size of the buttons is to change your screen resolution.
- The Quick Access Toolbar cannot be displayed on multiple lines. If you’ve added more commands than the space available, some commands won’t be visible. To view them, click the More Controls button.
How to customize Quick Access Toolbar Window
Most customizations to the QAT are done in the Customize Quick Access Toolbar window, which is part of the Excel Options dialog box. You can open this window by following these steps:
Step 1: Click on the File tab and go to the Excel Options.

Step 2: Click on the customize button.
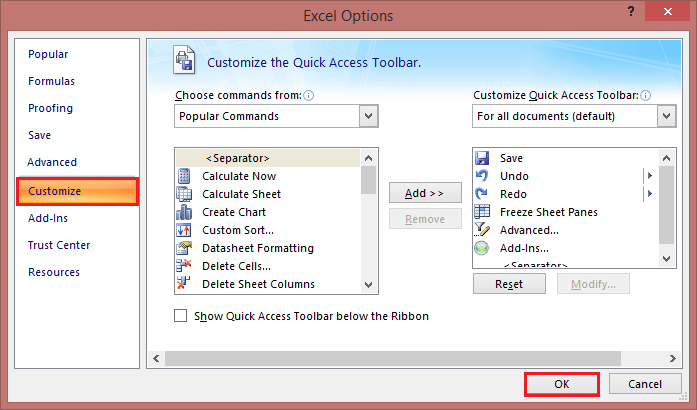
Step 3: The Customize Quick Access Toolbar dialog window will open, where you can add, remove, and reorder the QAT commands.
Step 4: And then click on the OK button.
How to Add Command Button to Quick Access Toolbar
Depending on what kind of command you want to add, this can be done in three different ways.
- Enable a command from the predefined list
To enable a currently hidden command from the predefined list, this is what you need to do:
- Click the Customize Quick Access Toolbar button (the down arrow).
- In the list of the displayed commands, click the one you want to enable.
For example, to be able to create a new worksheet with a mouse click, select the New command in the list, and the corresponding button will immediately appear in the Quick Access Toolbar:

- Add a ribbon button to Quick Access Toolbar
The fastest way to add to the QAT a command that appears on the ribbon is:
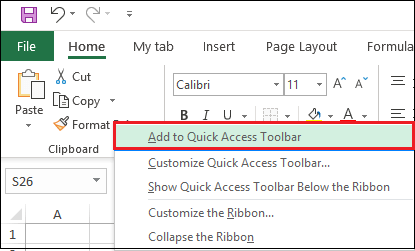
- Right-click the desired command on the ribbon.
- And select the Add to Quick Access Toolbar in the context menu.
- Add a command that isn’t on the ribbon to Quick Access Toolbar
To add a button that is not available on the ribbon, follow these steps:
Step 1: Right-click on the ribbon and click Customize Quick Access Toolbar.
Step 2: In the Choose commands from the drop-down list on the left, select Commands Not in the Ribbon.
Step 3: In the list of commands on the left, click the command you want to add.
Step 4: Click on the Add button.
Step 5: Click on the OK to save the changes.
For example, to have New open Excel windows with a single mouse click, you can add the New button to the Quick Access Toolbar.

How to Remove a Command from Quick Access Toolbar
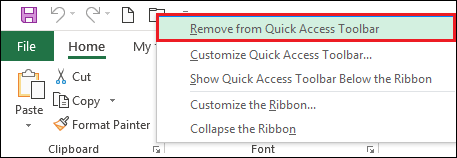
To remove either a default or custom command from the Quick Access Toolbar, right-click it and pick Remove from Quick Access Toolbar from the pop-up menu.
Or select the command in the Customize the Quick Access Toolbar window, and then click the Remove button.
Rearrange Commands on Quick Access Toolbar
To change the order of the quick access toolbar commands, follow the following steps:
Step 1: Open the Customize the Quick Access Toolbar window.
Step 2: Under Customize Quick Access Toolbar on the right, select the command you want to move, and click the Move Up or Move Down arrow.
For example, to move the New File button to the far-right end of the quick access toolbar, select it and click the Move Down arrow.

Group Commands on Quick Access Toolbar
If your quick access toolbar contains quite a lot of commands, you may want to sub-divide them into logical groups. For example, separate the default and custom commands.
Though the Quick Access Toolbar does not allow creating groups like on the Excel ribbon, you can group commands by adding a separator. Follow the following steps, such as:
Step 1: Open the Customize the Quick Access Toolbar dialog window.
Step 2: In the Choose commands from the drop-down list on the left, pick Popular Commands.
Step 3: In the list of commands on the left, select and click Add.
Step 4: Click the Move Up or Move Down arrow to position the separator where needed.
Step 5: Click OK to save the changes.

As a result, it separates the command, and the quick access toolbar appears to have two sections, as shown in the below image:
Add Macros to Quick Access Toolbar
To have your favorite macros at your fingertips, you can add them to the QAT too. To have it done, then follow these steps:
Step 1: Open the Customize the Quick Access Toolbar window.
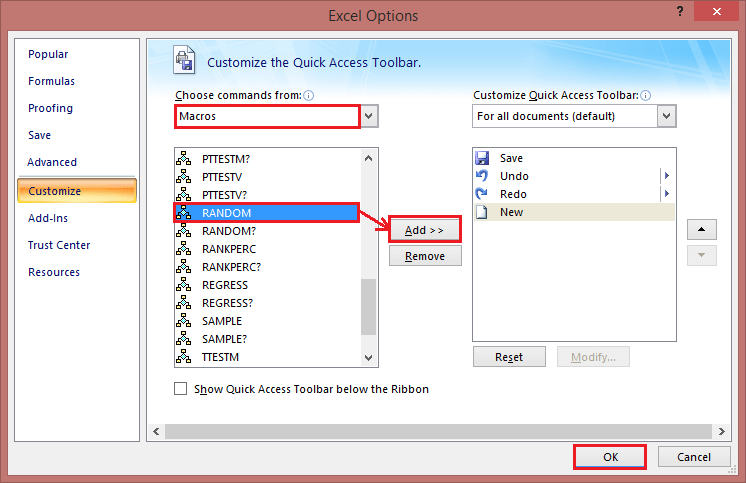
Step 2: In the Choose commands from the drop-down list on the left, select Macros.
Step 3: In the list of macros, select the one you wish to add to the Quick Access Toolbar.
Step 4: Click on the Add button.
Step 5: Click on the OK to save the changes and close the dialog box.
As an example, we are adding a custom macro RANDOM in the current workbook:
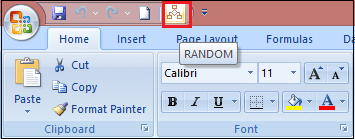
Optionally, you can put a separator before the macro like shown in the screenshot below:
Export and Import a Custom Quick Access Toolbar
Microsoft Excel allows saving your Quick Access Toolbar and ribbon customizations into a file that can be imported later. This can help you keep your Excel interface looking the same on all the computers you use and share your customizations with your colleagues.
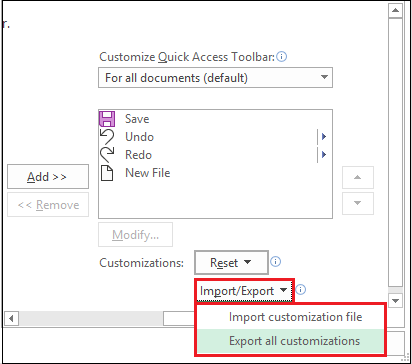
- Export a customized quick access toolbar:
In the Customize the Quick Access Toolbar window, click Import/Export, then click Export all customizations, and save the customizations file to some folder. - Import a customized quick access toolbar:
In the Customize the Quick Access Toolbar window, click Import/Export, select Import customization file, and browse for the customizations file you saved earlier.
The file that you export and import also includes the ribbon customizations. Unfortunately, there is no easy way to export or import, only the Quick Access Toolbar.
When you import the customizations file to a given PC, all prior ribbon and QAT customizations on that PC are permanently lost. To restore your current customizations in the future, be sure to export them and save them as a backup copy before importing any new customizations.


