
Scroll Bar in Excel
STEP-1
To open the DEVELOPER tab, place your cursor at the menu bar and right click anywhere. Select Customize the Ribbon from the drop down menu.

STEP-2
The option dialog box will open. In the option dialog box Under Customize the Ribbon: Main Tabs select the Developer check box and click on the ok button.

STEP-3
The developer tap is now visible and is present next to the view tab on the top menu bar. Now click on the Developer tab, select insert and then Scroll Bar (Form Control).

STEP-4
Right click on the scroll bar and click anywhere on your worksheet. You have now inserted a scroll bar.

STEP-5
Right click on the scroll bar. Select format control from the dropdown menu and then go to the controls tab. Insert values you would like in here and that’s it! You have done it!


Now you are able to make your worksheet more interactive and dynamic.
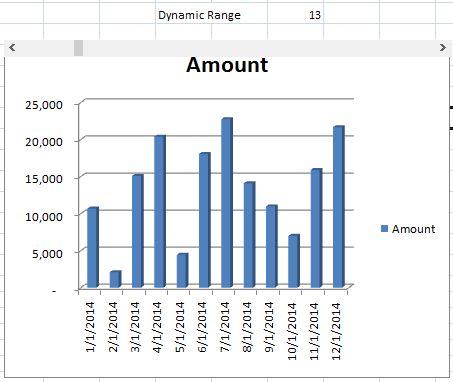
Scroll Bars will help you to scroll your Charts, Dashboards and reports.
This is the chart with scrollbar you can easily insert:
Check below links to learn more.


